Foster Acceptance and Resilience: Building Emotional Strength and Flexibility

acceptance-and-resilience-activities-help-children

Acceptance and resilience form the foundation for moving beyond a victim mindset.

 When children learn to acknowledge and accept their emotions while developing the capacity to bounce back from challenges, they begin to see difficulties as temporary and manageable rather than overwhelming or defining.

These activities are designed to help 7-year-olds and above develop both emotional acceptance—the ability to recognize and make peace with feelings without being controlled by them—and resilience—the capacity to adapt and recover from setbacks. 

Through these practices, children build the emotional muscles needed to face life’s inevitable challenges with confidence rather than helplessness.

Activities

1. Emotion Acceptance Art

Purpose: To help children identify, express, and accept all emotions through creative expression, reducing the tendency to suppress or become overwhelmed by difficult feelings.
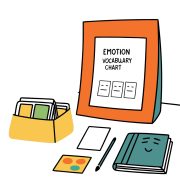
Materials Needed:

  • Variety of art supplies (paper, markers, paint, clay, collage materials)
  • Emotion vocabulary cards or chart
  • Calm, private space for creation
  • Display area for finished art
  • Reflection questions
  • Storage portfolio for emotional artwork
  • Emotion expression examples
variety-of-art-supplies--paper--markers--paint--cl

Steps:

1.

Creating a Safe Emotional Expression Space:

Set the stage for authentic emotional exploration:

  1. Prepare a comfortable environment:
    1. Choose a quiet, private area
    2. Allow plenty of time without rushing
    3. Remove distractions
    4. Play soft, calming music if helpful
    5. Gather a variety of expressive materials
  2. Establish supportive ground rules:
    1. All emotions are acceptable to express
    2. No judgments about artistic skills
    3. Creation is more important than the final product
    4. Expression is personal—share only if comfortable
    5. Respect for materials and space
  3. Introduce the concept in child-friendly terms:
    1. “Our feelings are like visitors—some we like and some are harder to have around.”
    2. “Art helps us see and understand our feelings better.”
    3. “Getting feelings out through art helps them feel less big inside us.”
    4. “We can learn something from all our emotions, even the difficult ones.”

2.

Guiding Emotional Awareness and Expression:

Help your child connect with their authentic emotions:

  1. Begin with emotion identification:
    1. “What are you feeling right now?”
    2. “Can you remember a time today when you had a strong feeling?”
    3. “Let’s look at our emotion chart—which ones have you felt recently?”
    4. “Where do you feel that emotion in your body?”
    5. “If this feeling had a color/shape/texture, what would it be?”
  2. Provide expressive prompts if needed:
    1. “Create something that shows how you feel inside right now.”
    2. “Make a picture of what your anger/sadness/worry looks like.”
    3. “Choose colors that match your feeling.”
    4. “Draw where in your body you feel this emotion.”
    5. “Create a monster/animal/creature that represents this feeling.”
  3. Offer technical support without directing:
    1. Demonstrate various techniques if requested
    2. Suggest materials that might express different emotions
    3. Ask what they need to express their feeling fully
    4. Provide help with challenging aspects if needed
    5. Stay nearby but allow independent creation

3.

Facilitating Reflection and Acceptance:

Guide conversation that promotes understanding and acceptance:

  1. Ask open-ended questions about the creation:
    1. “Can you tell me about what you made?”
    2. “What does this part represent?”
    3. “How did it feel to create this?”
    4. “Does making this art change how you feel about the emotion?”
    5. “What would your emotion want you to know if it could talk?”
  2. Help connect emotions to needs and experiences:
    1. “What might have caused this feeling?”
    2. “What does this feeling need?”
    3. “Is this feeling trying to tell you something important?”
    4. “When else have you felt this way?”
    5. “How long do these feelings usually stay with you?”
  3. Validate and normalize all emotions:
    1. “It makes sense you would feel that way when…”
    2. “Everyone feels this emotion sometimes.”
    3. “This is a normal reaction to what happened.”
    4. “Feelings come and go—they’re visitors, not permanent.”
    5. “Even difficult feelings have important messages for us.”

4.

Developing an Acceptance Practice:

Build habits that foster emotional acceptance:

  1. Create regular emotion art sessions:
    1. Weekly emotion check-in art
    2. Special sessions after significant events
    3. Morning or evening emotion expression
    4. Art journaling with emotional components
    5. Seasonal emotion reflection projects
  2. Establish a ritual for “completing” emotional expression:
    1. Taking a deep breath when finished
    2. Giving the emotion a name or title
    3. Deciding where to display or store the art
    4. Sharing if desired or keeping private
    5. Transition activity to re-center afterward
  3. Build an emotional acceptance vocabulary:
    1. “I notice I’m feeling…”
    2. “This feeling is here right now, and that’s okay.”
    3. “I can make room for this feeling.”
    4. “This emotion is just one part of me, not all of me.”
    5. “Feelings come and go like clouds in the sky.”

5.

Connecting Art to Emotional Growth:

Help your child see patterns and progress in their emotional journey:

  1. Create an emotion art portfolio:
    1. Date each creation
    2. Periodically review past emotional expressions
    3. Notice patterns or changes in emotional expression
    4. Identify growth in emotional vocabulary and awareness
    5. Celebrate increased comfort with emotional expression
  2. Discuss the relationship between acceptance and coping:
    1. “How does expressing your emotion change how it feels?”
    2. “What have you learned about handling this feeling?”
    3. “How has making art helped you understand your emotions?”
    4. “What do you notice about how emotions change over time?”
    5. “How can accepting feelings help us move through them?”

Adaptations for Different Needs:

classroom-group-discussion
  • For children who struggle with identifying emotions: Start with basic emotions and use color/shape associations
  • For highly verbal children: Add written descriptions or stories to their artwork
  • For children who resist art activities: Try music, movement, or clay as alternative expression forms
  • For children with sensory sensitivities: Select materials that accommodate their preferences

2. Resilience Role Models

Purpose: To help children understand resilience through concrete examples and stories, providing them with templates for facing challenges and building their own resilience narratives.

Materials Needed:

  • Age-appropriate books or stories about resilient individuals
  • Pictures or videos of role models
  • Role model profile sheets
  • Discussion question cards
  • Art supplies for response activities
  • Resilient quality cards
  • Role model journal
  • Family resilience stories
age-appropriate-books-or-stories-about-resilient-i

Steps:

1.

Selecting Appropriate Resilience Examples:

Choose stories and role models that resonate with your child:

  1. Consider diverse types of resilience:
    1. Overcoming physical challenges
    2. Persisting through learning difficulties
    3. Managing life changes and transitions
    4. Navigating social or emotional hurdles
    5. Recovering from disappointments or failures
    6. Facing fears or anxiety
  2. Include varied resilience examples:
    1. Historical figures who overcame adversity
    2. Contemporary role models facing challenges
    3. Characters from books or media
    4. Family members with resilience stories
    5. Age peers showing resilient qualities
    6. Animals demonstrating resilience (real or fictional)
  3. Ensure age-appropriate complexity:
    1. Simple, clear storylines for younger children
    2. Concrete examples of resilient actions
    3. Challenges that are relatable but not frightening
    4. Emphasis on process rather than just outcomes
    5. Authentic struggles with positive resolutions

2.

Presenting Resilience Stories Effectively:

Share stories in ways that highlight key resilience lessons:

  1. Create an engaging introduction:
    1. Connect to your child’s interests or experiences
    2. Explain why you chose this particular story
    3. Ask what they know about the person/character
    4. Set a purpose for listening (“Notice how they handled problems”)
    5. Create anticipation about the challenges faced
  2. Emphasize resilience elements during sharing:
    1. Point out difficult moments and feelings
    2. Highlight specific actions taken
    3. Note help that was sought or accepted
    4. Discuss turning points in the story
    5. Identify character strengths demonstrated
  3. Make abstract qualities concrete:
    1. Define resilience terms in child-friendly language
    2. Give specific examples of persistence, courage, flexibility
    3. Connect qualities to observable behaviors
    4. Use visual aids to represent resilience concepts
    5. Create analogies that make resilience tangible

3.

Facilitating Meaningful Discussion:

Guide conversation that extracts valuable lessons:

  1. Ask questions that promote understanding:
    1. “What challenges did this person face?”
    2. “How do you think they felt when that happened?”
    3. “What did they do when things got difficult?”
    4. “Who or what helped them?”
    5. “What qualities helped them overcome their challenges?”
  2. Make personal connections:
    1. “Have you ever felt like this person did?”
    2. “What do you have in common with them?”
    3. “Have you faced any similar challenges?”
    4. “What would you have done in their situation?”
    5. “Which of their strengths do you think you have too?”
  3. Discuss resilience strategies explicitly:
    1. “What helped them keep going when things were hard?”
    2. “How did they think about their problem?”
    3. “What did they do to feel better when they were upset?”
    4. “Who did they get help from?”
    5. “How did they change their plan when the first one didn’t work?”

4.

Reinforcing Learning Through Activities:

Deepen understanding through hands-on engagement:

  1. Create resilience-focused responses:
    1. Draw a scene showing the role model being resilient
    2. Write a letter to the role model
    3. Act out the story with emphasis on resilient moments
    4. Create a poster highlighting resilient qualities
    5. Make a comic strip of the resilience journey
  2. Develop personal resilience connections:
    1. “If you were facing a hard time, what would [role model] suggest?”
    2. “Which of their strategies could you try?”
    3. “What would be your resilience motto, inspired by their story?”
    4. “What’s one small way you could be more like them?”
    5. “How might their example help you with [current challenge]?”
  3. Build a resilience vocabulary and concept bank:
    1. Create resilience quality cards
    2. Develop a resilience strategies list
    3. Make a resilience quotes collection
    4. Build a “resilience helpers” directory
    5. Start a resilience journal inspired by role models

5.

Creating Ongoing Resilience References:

Build a library of examples to draw upon during challenges:

  1. Develop a resilience role model collection:
    1. Create a special bookshelf of resilience stories
    2. Make a resilience role model poster or bulletin board
    3. Compile a photo album of resilient individuals
    4. Create role model profile cards
    5. Record family members sharing resilience stories
  2. Reference role models during difficult times:
    1. “Remember how [role model] handled a similar problem?”
    2. “What would [role model] do in this situation?”
    3. “Which of our resilience heroes had to be patient like this?”
    4. “Should we look at our resilience examples for ideas?”
    5. “You’re showing courage just like [role model] did.”
  3. Encourage role model identification in daily life:
    1. Notice resilience in community members
    2. Point out resilience examples in current events
    3. Watch for resilient characters in media
    4. Acknowledge resilience in peers and family
    5. Help your child see themselves as a resilience role model

Role Model Selection Tips:

classroom-group-discussion
  • Balance extraordinary achievements with relatable, everyday resilience
  • Include examples from your child’s cultural background
  • Find role models with similar challenges to what your child faces
  • Include both historical and contemporary examples
  • Consider role models of different ages, including children and young people

3. Support Circle

Purpose:  To help children identify and activate their support network, reinforcing that seeking help is a strength and an important part of resilience.
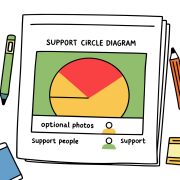
Materials Needed:

  • Large paper for the support circle diagram
  • Markers, colored pencils, or crayons
  • Photos of support people (optional)
  • Support categories list
  • Contact information for supporters
  • Support situation cards
  • Gratitude materials
  • Support circle display location
large-paper-for-the-support-circle-diagram-markers

Steps:

1.

Introducing the Support Circle Concept:

Help your child understand the value of support networks:

  1. Explain the purpose in child-friendly terms:
    1. “Everyone needs help sometimes—even grown-ups.”
    2. “Having people to help us makes us stronger, not weaker.”
    3. “Different people can help us in different ways.”
    4. “Knowing who to ask for help is a very grown-up skill.”
    5. “Being connected to others is one of our superpowers.”
  2. Use accessible analogies:
    1. “Support people are like your team or crew.”
    2. “Having supporters is like having different tools in a toolbox.”
    3. “Your support circle is like a safety net when you’re trying something hard.”
    4. “People who help us are like bridges over tricky waters.”
    5. “Support people give us extra strength, like charging a battery.”
  3. Share about your own support network:
    1. Describe who you turn to when you need help
    2. Explain different types of support you receive
    3. Share a recent example of when you needed support
    4. Express gratitude for your supporters
    5. Note how support helps you be more resilient

2.

Creating the Visual Support Circle:

Design a meaningful representation of the support network:

  1. Prepare the circle format:
    1. Draw a large circle with your child in the center
    2. Create different rings or sections for types of support
    3. Use colors to code different support categories
    4. Make the visual appealing and personalized
    5. Consider the appropriate size for display
  2. Identify diverse supporters together:
    1. Family members (immediate and extended)
    2. Friends (child’s and family friends)
    3. School connections (teachers, counselors, staff)
    4. Community helpers (doctors, librarians, coaches)
    5. Neighbors and local connections
    6. Pets and comfort objects (for emotional support)
  3. Add rich details to each supporter:
    1. Names and relationships
    2. Photos or drawings if available
    3. Special strengths or help they provide
    4. How to contact them
    5. Memories of times they provided support

3.

Exploring Different Types of Support:

Help your child understand various forms of help:

  1. Discuss different support categories:
    1. Emotional support (listening, comforting, understanding)
    2. Practical help (assistance with tasks, teaching skills)
    3. Informational support (advice, knowledge, guidance)
    4. Companionship (play, shared activities, presence)
    5. Emergency help (safety, urgent needs)
  2. Match supporters to support types:
    1. “Who helps you feel better when you’re sad?”
    2. “Who is good at teaching you new things?”
    3. “Who can help if you have a question about something?”
    4. “Who do you like to play with or spend time with?”
    5. “Who would you go to in an emergency?”
  3. Create support scenarios:
    1. “If you were feeling nervous about a test, who could help?”
    2. “If you needed help with a difficult homework assignment…?”
    3. “If you had a disagreement with a friend…?”
    4. “If you felt scared or worried about something…?”
    5. “If you needed help learning a new skill…?”

4.

Practicing Support-Seeking Skills:

Develop comfort and competence in asking for help:

  1. Teach appropriate help-seeking language:
    1. “I’m having a hard time with… Could you help me?”
    2. “I need some help figuring out…”
    3. “I’m feeling… and I could use some support.”
    4. “Can I talk to you about something that’s bothering me?”
    5. “I’m not sure what to do about… Do you have any ideas?”
  2. Role-play support-seeking scenarios:
    1. Practice asking for help with a school problem
    2. Rehearse sharing feelings with a trusted adult
    3. Try asking a friend for help during play
    4. Practice calling a family member for advice
    5. Simulate asking a teacher for assistance
  3. Discuss help-seeking boundaries:
    1. Matching the helper to the type of help needed
    2. Appropriate times and ways to ask for help
    3. What to do if the first person can’t help
    4. Recognizing when help is needed
    5. Understanding that everyone has limits

5.

Maintaining and Strengthening the Support Network:

Build habits that nurture connections:

  1. Create regular support check-ins:
    1. Review the support circle periodically
    2. Update with new supporters
    3. Discuss recent experiences of receiving help
    4. Identify any needed additions to the network
    5. Reflect on personal growth in help-seeking
  2. Foster reciprocal relationships:
    1. Discuss ways your child can support others
    2. Create thank you notes or gifts for supporters
    3. Plan acts of kindness for support circle members
    4. Talk about the two-way nature of healthy relationships
    5. Acknowledge your child’s role in others’ support circles
  3. Make the support circle accessible:
    1. Display in a prominent location
    2. Create a portable mini-version
    3. Review before potentially challenging situations
    4. Reference during problem-solving discussions
    5. Celebrate when the support system works well

Support Circle Adaptations:

classroom-group-discussion
  • For children with smaller support networks: Focus on depth of support rather than quantity
  • For children who resist asking for help: Start with less vulnerable support needs
  • For anxious children: Create very concrete contact plans for different supporters
  • For children with social challenges: Include support resources and tools, not just people

4. Coping Skills Toolbox

Purpose: To develop a personalized set of practical strategies for handling difficult emotions and situations, building confidence in the ability to manage challenges.
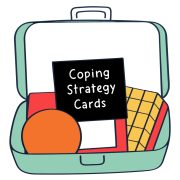
Materials Needed:

  • Container for the toolbox (box, bag, folder)
  • Coping strategy cards
  • Visual reminders of techniques
  • Calming items (stress ball, fidget toy)
  • Comfort objects
  • Art supplies for creating tools
  • Toolbox decorating materials
  • Strategy testing checklist
container-for-the-toolbox--box--bag--folder--copin

Steps:

1.

Introducing the Concept of Coping Tools:

Help your child understand how coping strategies work:

  1. Explain using child-friendly language:
    1. “Just like we have tools to fix things around the house, we can have special tools to help with big feelings.”
    2. “Different tools work for different situations and people.”
    3. “Having many tools gives you choices when one doesn’t work.”
    4. “Learning to use these tools takes practice, just like learning any new skill.”
    5. “Using coping tools shows you’re strong and smart about handling feelings.”
  2. Normalize coping needs:
    1. Share age-appropriate examples of when you use coping strategies
    2. Discuss how everyone needs tools for tough times
    3. Read stories featuring characters using coping skills
    4. Point out coping strategies used by admired figures
    5. Frame coping tools as skills rather than remedies for deficits
  3. Create excitement about building the toolbox:
    1. Let them choose and decorate the container
    2. Present it as a special project about growing stronger
    3. Emphasize their role in selecting what works for them
    4. Frame it as building “feeling superpowers”
    5. Plan a special time to work on it together

2.

Exploring Different Types of Coping Strategies:

Introduce a variety of techniques to try:

  1. Present diverse coping categories:
    1. Calming strategies (deep breathing, counting, quiet time)
    2. Physical outlets (running, jumping, dancing, sports)
    3. Creative expression (drawing, writing, music, clay)
    4. Cognitive approaches (positive self-talk, problem-solving steps)
    5. Sensory tools (fidget items, weighted objects, music)
    6. Social strategies (talking to someone, asking for a hug)
  2. Demonstrate strategies concretely:
    1. Show how to use each technique
    2. Practice together multiple times
    3. Create visual reminders with pictures
    4. Record simple instructions for each tool
    5. Make connections to when each might be helpful
  3. Allow for personalization:
    1. Offer choices within categories
    2. Adapt strategies to match preferences
    3. Create unique names for favorite techniques
    4. Modify approaches based on their feedback
    5. Add personal touches to make tools their own

3.

Testing and Selecting Effective Tools:

Help your child discover what works for them:

  1. Create a strategy testing plan:
    1. Try different tools when calm first
    2. Test one new strategy each day
    3. Practice for short periods regularly
    4. Use a simple rating system for effectiveness
    5. Keep notes on what works and when
  2. Guide reflection on strategy testing:
    1. “How did your body feel before and after trying this?”
    2. “What did you notice about your thoughts when using this tool?”
    3. “On a scale of 1-5, how helpful was this for you?”
    4. “When do you think this tool would work best?”
    5. “Would you want to try this again or change it somehow?”
  3. Build the personalized toolbox:
    1. Include visual reminders of favorite strategies
    2. Add tangible items for specific techniques
    3. Create strategy cards with simple instructions
    4. Organize tools by type or situation
    5. Make sure the toolbox is accessible and appealing

4.

Implementing Coping Tools in Real Situations:

Support the transition from practice to application:

  1. Watch for opportunities to suggest tools:
    1. Notice early signs of distress or frustration
    2. Gently remind about available coping strategies
    3. Offer specific suggestions based on the situation
    4. Provide support in using tools when needed
    5. Gradually encourage independent tool selection
  2. Guide in-the-moment tool use:
    1. Keep prompts simple and calm
    2. Offer to use a strategy together
    3. Provide necessary space or materials
    4. Acknowledge effort regardless of outcome
    5. Reflect together after the emotion has passed
  3. Create environmental supports:
    1. Post visual reminders of favorite strategies
    2. Keep portable tools available for different settings
    3. Establish a calm-down space with tools accessible
    4. Create cues or signals for tool use
    5. Share appropriate strategies with other caregivers

5.

Refining and Expanding the Toolbox:

Help the toolbox grow with your child:

  1. Schedule regular toolbox reviews:
    1. Check which tools are being used
    2. Discuss what’s working well and what isn’t
    3. Remove or modify ineffective strategies
    4. Add new tools based on changing needs
    5. Celebrate mastery of coping skills
  2. Connect to growing emotional needs:
    1. Add tools for newly emerging challenges
    2. Develop more sophisticated versions of favorite strategies
    3. Incorporate tools that build independence
    4. Add preventative strategies, not just reactive ones
    5. Include tools for different environments
  3. Foster ownership and pride:
    1. Encourage your child to teach tools to others
    2. Notice and comment when tools are used effectively
    3. Ask for their expertise on what works for them
    4. Acknowledge growing emotional management skills
    5. Treat the toolbox as a sign of maturity and strength

Coping Strategy Examples for 7-Year-Olds:

classroom-group-discussion
  • “Balloon breathing” (slow deep breaths with visualization)
  • “Feelings thermometer” (emotion scale with matched strategies)
  • “Shake it out” (physical movement to release tension)
  • “Happy place” (guided imagination of a safe, calm place)
  • “Helping thoughts” (simple positive self-talk phrases)
  • “Problem-solving steps” (visual reminder of steps to solve problems)

5. Community Helper Project

Purpose: To develop empathy, agency, and perspective by contributing positively to the community, helping children recognize their capacity to make a difference.

Materials Needed:

  • Community need information
  • Project planning worksheet
  • Required project supplies
  • Helper reflection journal
  • Camera for documentation
  • Thank you card materials
  • Impact measurement tools
  • Helper certificate or badge
community-need-information-project-planning-worksh

Steps:

1.

Identifying Meaningful Ways to Help:

Find age-appropriate opportunities that connect to your child’s interests:

  1. Explore various contribution types:
    1. Environmental projects (park clean-ups, recycling initiatives)
    2. Animal welfare (making toys for shelter animals, fundraising)
    3. Helping vulnerable populations (creating cards for seniors, collecting items for shelters)
    4. Neighborhood improvements (planting flowers, making welcome packages)
    5. Support for other children (book drives, friendship benches)
  2. Guide a needs assessment process:
    1. Take a “helping walk” around your neighborhood
    2. Discuss needs you observe in your community
    3. Read local news appropriate for children
    4. Connect with community organizations
    5. Talk about issues your child has noticed
  3. Match projects to your child’s interests and strengths:
    1. What causes do they care about?
    2. What skills do they enjoy using?
    3. What past experiences have engaged them?
    4. What time commitment is appropriate?
    5. Which projects provide tangible outcomes?

2.

Planning a Successful Helper Project:

Set up the experience for meaningful impact:

  1. Create a child-friendly project plan:
    1. Clear, specific goals
    2. Step-by-step action items
    3. Materials and resources needed
    4. Timeline with manageable chunks
    5. Roles for different participants
    6. Visual documentation of the plan
  2. Prepare for the helping experience:
    1. Research the issue or need being addressed
    2. Learn about the people or organization being helped
    3. Gather necessary supplies and permissions
    4. Talk about what to expect
    5. Discuss appropriate behavior and boundaries
    6. Address any concerns or questions
  3. Set appropriate expectations:
    1. Discuss realistic impact
    2. Prepare for potential challenges
    3. Talk about feelings that might come up
    4. Emphasize the process over perfect outcomes

3.

Facilitating the Helping Experience:

Support your child in making a meaningful contribution:

  1. Create the right balance of guidance and ownership:
    1. Allow your child to take the lead where possible
    2. Provide behind-the-scenes support as needed
    3. Offer help with challenging aspects
    4. Step back when they show confidence
    5. Acknowledge their leadership and ideas
  2. During the activity, encourage reflection:
    1. “How do you think this is helping?”
    2. “What are you noticing about this experience?”
    3. “How does it feel to be doing this work?”
    4. “What’s challenging about this? What’s rewarding?”
    5. “What are you learning as you do this?”
  3. Document the experience:
    1. Take photos of your child in action
    2. Record quotes or observations
    3. Save examples of the work done
    4. Create a timeline of the project
    5. Collect reactions from those impacted

4.

Processing the Helping Experience:

Guide reflection that deepens learning and connection:

  1. After the project, discuss the experience:
    1. “What did you enjoy most about helping?”
    2. “What difference do you think our project made?”
    3. “Was anything surprising about the experience?”
    4. “How did helping make you feel?”
    5. “What did you learn from this project?”
  2. Connect to broader concepts:
    1. The ripple effect of positive actions
    2. How many people working together create change
    3. The different ways people can contribute
    4. The relationship between helping and well-being
    5. The importance of both giving and receiving help
  3. Express and receive appreciation:
    1. Create thank you notes for anyone who supported the project
    2. Review appreciative feedback received
    3. Acknowledge your child’s contribution specifically
    4. Celebrate the completion of the project
    5. Express gratitude for the opportunity to help

5.

Building on the Helping Experience:

Extend the impact beyond a single event:

  1. Create tangible reminders of the experience:
    1. Make a helping project scrapbook page
    2. Create a helper certificate or badge
    3. Display photos of the project
    4. Keep meaningful mementos
    5. Start a helper journal for multiple projects
  2. Connect to future helping opportunities:
    1. Discuss other needs that could be addressed
    2. Plan regular helping activities
    3. Look for ways to continue supporting the same cause
    4. Connect with organizations for ongoing involvement
    5. Encourage your child to suggest new projects
  3. Reinforce the helper identity:
    1. Point out how they made a difference
    2. Notice when they show helper qualities in daily life
    3. Share their contribution with important people
    4. Talk about them as someone who helps others
    5. Highlight the connection between helping and resilience

Age-Appropriate Helper Projects:

classroom-group-discussion
  • Creating cards or artwork for seniors or hospital patients
  • Assembling care packages for children in shelters
  • Participating in supervised park or beach clean-ups
  • Making simple bird feeders for a nature area
  • Helping collect and sort items for donation
  • Creating welcome kits for new students at school

These acceptance and resilience activities help children develop:

  • Comfort with the full range of emotions
  • Strategies for handling difficult feelings and situations
  • Understanding that asking for help is a strength
  • Examples of resilience to draw upon during challenges
  • The confidence that comes from helping others
acceptance-and-resilience-activities-help-children (1)

Remember that building emotional acceptance and resilience is an ongoing journey. Small, consistent efforts matter more than occasional grand gestures.

The goal is to help your child develop an internal foundation that allows them to face life’s inevitable challenges with confidence and flexibility rather than feeling victimized by them.
Next Steps

acceptance-and-resilience-activities-help-children (2)
  • Choose one activity to begin implementing this week
  • Start with shorter, simpler versions and build complexity over time
  • Notice and acknowledge moments when your child demonstrates acceptance or resilience
  • Share your own experiences with emotional acceptance and bouncing back from challenges
  • Look for daily opportunities to reinforce these skills in natural settings

The goal is to help your child develop the understanding that although we cannot control everything that happens to us, we can learn to accept our emotions and develop the resilience to move through difficulties with strength and hope.