Set Realistic Goals and Celebrate Achievements: Building Confidence Through Accomplishment

goal-setting-and-achievement-recognition-activitie (1)

Setting and achieving goals provides children with a powerful antidote to self-pity. 

When children experience the satisfaction of working toward and reaching objectives, they develop a sense of agency and capability that naturally counters feelings of helplessness. 

By learning to set realistic goals, break down challenges into manageable steps, and recognize their progress, children build the confidence and resilience needed to approach life’s difficulties with optimism.

These activities are designed to help 7-year-olds develop goal-setting skills and experience the joy of achievement. 

Through these practices, children learn to focus on what they can accomplish rather than dwelling on limitations or disappointments.

Activities

Table of Contents

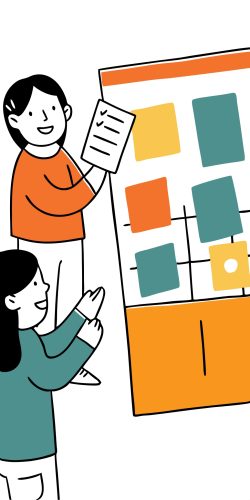
1. Goal-Setting Vision Board

Purpose: To create a visual representation of achievable goals that motivates effort and makes abstract aspirations concrete and visible.

Materials Needed:

  • Poster board or cork board
  • Magazines for cutting out images
  • Scissors and glue
  • Markers and colored pencils
  • Stickers or decorative items
  • Photographs (optional)
  • Post-it notes
  • Goal categories list
  • Display area
clear-jar-or-container-colorful-paper-slips-decora

Steps:

1.

Preparing for a Meaningful Vision Board:

Set the stage for thoughtful goal exploration:

  1. Choose a time when your child is relaxed and energetic
  2. Have a preliminary conversation about goals:
    1. “What are some things you’d like to learn or do?”
    2. “What would make you feel proud to accomplish?”
    3. “What would you like to get better at?”
  3. Introduce age-appropriate goal categories:
    • Personal qualities to strengthen (patience, courage)
    • Relationships to nurture (making new friends, helping siblings)
    • Knowledge to gain (learning about dinosaurs, space)
    • Contributions to make (helping with chores, community)
    • Skills to develop (riding a bike, swimming, reading)
  4. Gather diverse materials that might inspire different types of goals
  5. Create a comfortable, distraction-free workspace

2.

Creating Goals with the Right Level of Challenge:

Guide your child to develop goals that are both motivating and achievable:

  1. Help identify appropriately sized goals using the “just-right challenge” concept:
    1. Not too easy (already mastered)
    2. Not too hard (beyond current capabilities with support)
    3. Just right (challenging but achievable with effort and help)
  2. For each potential goal, discuss:
    1. Current abilities related to this goal
    2. Why this goal matters to them personally
    3. What achieving it might look like
    4. Potential steps toward accomplishment
  3. Transform goals into positive, specific statements:
    • Instead of: “Stop being scared of the dark”
      • Try: “Feel brave and comfortable at bedtime”
    • Instead of: “Be better at reading”
      • Try: “Read a chapter book by myself”

3.

Creating the Visual Representation:

Make the vision board visually appealing and meaningful:

  1. Divide the board into sections if using multiple goal categories
  2. For each goal, create a visual representation:
    1. Cut out or draw pictures representing the goal
    2. Write the goal in child-friendly language
    3. Add small step indicators (footprints, stepping stones)
    4. Include motivating words or quotes
    5. Add a photo of your child doing something related
  3. Let your child take the lead in arranging items
  4. Ask questions to deepen engagement:
    1. “What pictures show how you’ll feel when you reach this goal?”
    2. “What colors represent this goal for you?”
    3. “How would you like to organize your different goals?”
  5. Create a title for the board that feels empowering:
    1. “Alex’s Amazing Goals”
    2. “My Growth Journey”
    3. “Things I’m Working Toward”

4.

Implementing the Vision Board as a Tool:

Use the completed board to support ongoing motivation:

  1. Display the vision board prominently:
    1. In the child’s bedroom
    2. In a family area
    3. Near where related activities occur
  2. Establish a regular check-in routine:
    1. Weekly brief reviews of progress
    2. Monthly deeper discussions
    3. Spontaneous references when relevant
  3. During check-ins, discuss:
    1. Steps taken toward goals
    2. Challenges encountered
    3. New ideas for progress
    4. Whether goals need adjustment
    5. Celebrations of effort and achievement

5.

Evolving the Board Over Time:

Keep the vision board relevant and current:
  1. Allow for modifications as interests and abilities change
  2. Add achievement indicators:
    1. Star stickers for completed steps
    2. Dated notes showing progress
    3. Photos of accomplishments
    4. Completion celebrations
  3. When goals are achieved:
    1. Celebrate thoroughly
    2. Discuss what helped reach the goal
    3. Consider what new goals might follow
    4. Move completed goals to an “Achieved!” section
  4. Create a new board periodically:
    1. Every 6-12 months
    2. At the beginning of school year
    3. On birthdays
    4. When significant life changes occur

Age-Appropriate Goals for 7-Year-Olds:

classroom-group-discussion
  • Learn to ride a bike without training wheels
  • Read a chapter book independently
  • Learn to tell time on an analog clock
  • Master specific swimming skills
  • Learn to tie shoelaces
  • Complete a jigsaw puzzle with 100+ pieces
  • Learn 5 jokes to tell at family gatherings
  • Help prepare a simple meal

2. Achievement Jar

Purpose: To create a tangible record of accomplishments that builds confidence and counters negative self-talk by providing concrete evidence of capability and progress.

Materials Needed:

  • Clear jar or container
  • Decorating supplies
  • Colored paper for achievement notes
  • Pens, markers, or pencils
  • Achievement categories list
  • Scissors
  • Special occasion plans for jar opening
  • Calendar for scheduling reviews
clothing-storage-weather-app-on-phone-activity-cal

Steps:

1.

Creating a Meaningful Achievement Container:

Make the jar a special vessel for collecting success:

  1. Choose an appropriately sized container:
    1. Large enough to hold several months of achievements
    2. Clear to see contents accumulating
    3. Sturdy enough to handle regular use
  2. Decorate the jar together:
    1. Use your child’s favorite colors
    2. Add positive words and phrases
    3. Include their name and purpose
    4. Make it visually appealing
  3. Create a special label:
    1. “Achievement Jar”
    2. “Reasons to Be Proud”
    3. “[Child’s name]’s Awesome Moments”
    4. “Evidence of My Growth”
  4. Place the jar in a prominent location:
    1. Family gathering space
    2. Child’s bedroom
    3. Homework area
    4. Kitchen or dining room

2.

Defining Achievement Broadly:

Help your child understand that achievements come in many forms:

  1. Discuss different types of achievements to recognize:
    1. Effort achievements (trying something hard)
    2. Skill achievements (learning something new)
    3. Character achievements (showing kindness, courage)
    4. Academic achievements (reading, math progress)
    5. Social achievements (making friends, resolving conflicts)
    6. Personal achievements (managing emotions, overcoming fears)
    7. Create achievement categories that matter to your child
    8. Emphasize that small steps deserve celebration too
    9. Discuss the importance of noticing all kinds of growth, not just big accomplishments
    10. Create a balanced view that honors both product (what was achieved) and process (how it was achieved)

3.

Establishing a Regular Documentation Routine:

Make recording achievements a consistent habit:

  1. Set regular times for achievement reflections:
    1. End of each day
    2. Weekly family meetings
    3. After school check-ins
    4. Weekend reflection time
  2. Ask prompting questions:
    1. “What did you accomplish today that you’re proud of?”
    2. “What challenge did you face that you worked through?”
    3. “Did you try something new or difficult?”
    4. “How did you help someone else today?”
    5. “What did you do better today than yesterday?”
  3. Create a simple recording system:
    1. Write achievements on colorful paper slips
    2. Include the date and specific details
    3. Add small drawings or stickers if desired
    4. Have your child write or dictate to you
    5. Fold and add to jar with a small ceremony

4.

Adding Parental Observations:

Supplement child-identified achievements with your observations:

  1. Watch for achievements your child might miss:
    1. Moments of perseverance
    2. Kind actions toward others
    3. Brave responses to challenges
    4. Small improvements in difficult areas
    5. Positive attitude shifts
  2. Record these observations in first person:
    1. “I showed courage when…”
    2. “I was kind to someone by…”
    3. “I kept trying even though…”
  3. Share these with your child before adding to the jar:
    1. “I noticed something amazing that you did today…”
    2. “I’d like to add this to your achievement jar because…”
    3. “I was really proud when I saw you…”

5.

Celebrating Jar Achievements:

Create meaningful rituals for reviewing achievements:

  1. Schedule regular jar-opening celebrations:
    1. Monthly family achievement nights
    2. Quarterly jar review sessions
    3. When the jar becomes full
    4. During challenging times when encouragement is needed
  2. Make opening the jar special:
    1. Choose a comfortable family gathering time
    2. Provide a special snack or drink
    3. Create a celebratory atmosphere
    4. Take turns reading achievements aloud
    5. Express specific pride and recognition
  3. Connect past achievements to future goals:
    1. “These show how much you’ve grown in [area].”
    2. “Look at all the ways you’ve shown courage/persistence/kindness.”
    3. “Which of these achievements makes you most proud?”
    4. “What would you like to add to your jar next month?”

Achievement Categories to Consider:

classroom-group-discussion
  • New skills mastered
  • Challenges faced bravely
  • Problems solved creatively
  • Kind actions toward others
  • Persistent efforts
  • School accomplishments
  • Self-care achievements
  • Family contributions

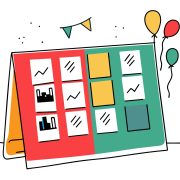
3. Mini-Project Planner

Purpose: To teach the process of breaking larger goals into manageable steps, tracking progress, and experiencing the satisfaction of completion.
Materials Needed:

  • Project planning template
  • Colored markers or pencils
  • Calendar or timeline
  • Project supplies (will vary by project)
  • Step completion stickers
  • Camera for documentation
  • Project display space
  • Celebration supplies
large-chart-or-board-task-cards-with-pictures-comp

Steps:

1.

Selecting an Appropriate Project:

Choose a project that balances challenge with achievability:

  1. Involve your child in project selection:
    1. “What’s something you’d like to create or accomplish?”
    2. “Would you rather do a project about [option 1] or [option 2]?”
    3. “What kind of project would make you feel proud when finished?”
  2. Consider different project types:
    1. Creating something physical (craft, model, garden)
    2. Planning an event (playdate, family game night)
    3. Learning a sequence of skills (magic tricks, dance routine)
    4. Collection and organization (rock collection, family photos)
    5. Service project (cards for seniors, neighborhood clean-up)
  3. Evaluate project suitability:
    1. Appropriate difficulty level
    2. Alignable with child’s interests
    3. Completable within 1-3 weeks
    4. Dividable into clear steps
    5. Resources readily available
    6. Opportunities for independence

2.

Creating a Child-Friendly Project Plan:

Break down the project into clear, manageable steps:

  1. Explain the planning process:
    1. “Big projects need to be broken into smaller steps.”
    2. “Planning helps us know what to do first, next, and last.”
    3. “A good plan makes a project less overwhelming.”
  2. Create a visual planning document together:
    1. List or draw each step in sequence
    2. Estimate time needed for each step
    3. Identify materials needed
    4. Note where help might be required
    5. Include check boxes or completion markers
  3. Make the plan appropriately detailed:
    1. For younger children: 5-7 main steps
    2. Include pictures or symbols for each step
    3. Use simple, action-oriented language
    4. Consider color-coding different types of tasks

3.

Guiding Project Implementation:

Support your child through the project while encouraging independence:

  1. Begin with an official “project start” moment:
    1. Review the entire plan
    2. Gather initial materials
    3. Take a “before” photo
    4. Make a small ceremony of beginning
  2. For each step, provide appropriate support:
    1. Review instructions together
    2. Demonstrate techniques if needed
    3. Provide help with difficult or unsafe elements
    4. Ask guiding questions rather than directing
    5. Gradually step back as confidence builds
  3. Maintain momentum with regular project sessions:
    1. Schedule specific project times
    2. Keep materials organized between sessions
    3. Begin each session by reviewing progress
    4. End each session by planning the next steps
    5. Document progress with photos

4.

Addressing Challenges Constructively:

Use difficulties as learning opportunities:

  1. When obstacles arise, guide problem-solving:
    1. “What part is challenging right now?”
    2. “What are some different ways we could solve this?”
    3. “Would looking at the instructions again help?”
    4. “Should we take a break and come back with fresh eyes?”
  2. Normalize challenges as part of the process:
    1. “Most projects have tricky parts—that’s normal.”
    2. “Making mistakes helps us learn what works better.”
    3. “Sometimes we need to adjust our plan, and that’s okay.”
  3. Adjust the plan if necessary:
    1. Add steps that were overlooked
    2. Modify approaches that aren’t working
    3. Extend timeline if neededSimplify aspects that are too challenging
    4. Always involve the child in plan adjustments

5.

Celebrating Project Completion:

Make project completion a meaningful milestone:

  1. Create a proper finish line:
    1. Final review of all steps completed
    2. Adding finishing touches
    3. Cleaning up project space
    4. Taking “after” photos
    5. Placing project in display area
  2. Hold a completion celebration:
    1. Invite family members to see the project
    2. Have your child explain the process
    3. Share challenges overcome
    4. Express specific appreciation for effort and perseverance
    5. Consider a small reward related to the project
  3. Reflect on the experience:
    1. “What are you most proud of about this project?”
    2. “What did you learn from doing this?”
    3. “What would you do differently next time?”
    4. “What kind of project would you like to try next? 

Sample Mini-Projects for 7-Year-Olds:

classroom-group-discussion
  • Bird feeder creation and installation
  • Themed collection with display (rocks, leaves, etc.)
  • Simple cooking project with multiple steps
  • Photo story book about family or friends
  • Growing plants from seeds
  • Planning and hosting a family game night
  • Creating a puppet show with homemade puppets
  • Building a model from a kit

4. Skills Progress Chart

Purpose: To visualize improvement over time in a specific skill area, reinforcing the connection between practice, effort, and growth.

Materials Needed:

  • Large poster board or chart paper
  • Markers or colored pencils
  • Stickers or stamps
  • Skill milestone checklist
  • Calendar for practice planning
  • Documentation tools (photos, videos)
  • Rewards for milestones (optional)
  • Practice log
display-space-presentation-cards-photography-equip

Steps:

1.

Selecting an Appropriate Skill Focus:

Choose a skill that matters to your child and shows observable progress:

  1. Discuss skill possibilities within these categories:
    1. Physical skills (sports, dance, coordination)
    2. Academic skills (reading, writing, math)
    3. Creative skills (drawing, music, crafts)
    4. Social skills (conversation, friendship, cooperation)
    5. Self-management skills (organization, routine following)
  2. Evaluate potential skill focuses:
    1. Child’s interest level and motivation
    2. Opportunities for regular practice
    3. Observable progress markers
    4. Appropriateness for developmental stage
    5. Available resources and support
  3. Narrow to one specific skill area:
    1. Not: “Getting better at soccer”
    2. But: “Improving my goal-scoring technique”
    3. Not: “Being better at math”
    4. But: “Learning my multiplication facts up to 5×5”

2.

Creating a Visual Progress Tracking System:

Design a chart that makes progress visible and motivating:

  1. Choose an appropriate chart format:
    1. Linear path with stepping stones
    2. Mountain with climbing levels
    3. Tree with growing branches or fruits
    4. Collection of puzzle pieces forming a picture
    5. Thermometer or gauge filling up
  2. Mark clear milestones along the path:
    1. Research appropriate skill progression
    2. Break the skill into 5-10 observable steps
    3. Include both process milestones (practices completed) and outcome milestones (skills mastered)
    4. Make each step a meaningful but achievable increment
  3. Create a visually appealing chart:
    1. Use bright colors and simple designs
    2. Include your child’s name and the skill focus
    3. Add encouraging phrases throughout
    4. Make milestone celebrations obvious
    5. Allow space for notes or observations

3.

Establishing a Consistent Practice Routine:

Set up a sustainable system for skill development:

  1. Create a reasonable practice schedule:
    1. Frequency appropriate for the skill (daily, several times weekly)
    2. Duration appropriate for age (10-20 minutes for most 7-year-olds)
    3. Timing that works with family routines
    4. Balance between consistency and flexibility
  2. Design practice sessions for success:
    1. Clear beginning and end
    2. Warm-up activity
    3. Main practice component
    4. Fun element or game
    5. Brief reflection moment
  3. Address potential practice resistance:
    1. Link practice to the visible progress chart
    2. Start with shorter, highly successful sessions
    3. Incorporate playful elements
    4. Join in the practice when possible
    5. Express genuine interest in their development

4.

Documenting and Celebrating Progress:

Create meaningful ways to record and recognize improvement:

  1. Track progress in multiple ways:
    1. Update the chart after practice sessions
    2. Take photos or videos at regular intervals
    3. Keep dated samples of work when applicable
    4. Note observations of improvement
  2. Celebrate different types of victories:
    • Consistency milestones (days practiced)
    • Effort recognition (trying hard things)
    • Skill achievements (mastering specific techniques)
    • Attitude wins (persisting through frustration)
  3. Mark major milestones with special recognition:
    1. Small celebrations for incremental steps
    2. Bigger celebrations for significant achievements
    3. Privileges related to the new skill
    4. Sharing accomplishments with important people

5.

Reflecting on the Growth Process:

Help your child connect progress with their efforts:

  1. During regular check-ins, discuss:
    1. “What do you notice about your progress?”
    2. “Which practice strategies are helping the most?”
    3. “How does it feel to see your improvement?”
    4. “What has been challenging and how have you handled it?”
  2. Connect specific actions to results:
    1. “I noticed that after practicing [specific technique], you really improved at…”
    2. “Your decision to practice extra on Saturday really shows in how you can now…”
    3. “The way you tried different approaches until you found what works shows in…”
  3. Use the completed or advancing chart to build confidence:
    1. Refer back to starting point to illustrate growth
    2. Apply lessons to other challenges
    3. Discuss how this experience might help with future goals
    4. Consider what new skill they might want to develop next

Sample Progress Chart Milestones:

classroom-group-discussion

For Reading Fluency:

  • Read 10 sight words without hesitation
  • Read a simple book with 90% accuracy
  • Read smoothly without pointing to each word
  • Read with expression that matches the story
  • Read 60 words per minute accurately

For Basketball Skills:

  • Dribble 10 times without losing control
  • Make 3 out of 5 close-range baskets
  • Dribble while walking forward
  • Pass successfully to a partner 5 times in a row
  • Dribble with alternate hands

5. Family Success Stories Night

Purpose: To create a regular family ritual that normalizes achievement sharing, provides social recognition, and builds a supportive community for goal pursuit.

Materials Needed:

  • Family calendar for scheduling
  • Success sharing prompt cards
  • Special success celebration items
  • Success journal or scrapbook
  • Achievement tokens or stickers
  • Listening props (talking stick, etc.)
  • Snacks or special meal items
  • Camera for documentation
scenario-cards-solution-worksheets-decision-making

Steps:

1.

Establishing a Meaningful Family Tradition:

Create a consistent structure that everyone values:

  1. Choose a regular schedule:
    • Weekly (shorter sessions)
    • Bi-weekly (medium sessions)
    • Monthly (longer, more special sessions)
  2. Select a consistent time and setting:
    • Family dinner with extended table time
    • Special dessert gathering
    • Weekend morning breakfast
    • Evening family circle before bedtime
  3. Create atmosphere enhancers:
    • Special tablecloth or placemats
    • Candles or special lighting
    • “Success Stories” sign or banner
    • Special plates or cups
    • Background music
  4. Develop opening and closing rituals:
    • Special greeting or family chant
    • Gratitude moment before sharing
    • Closing affirmation or cheer
    • Group hug or handshake

2.

Guiding Meaningful Success Sharing:

Help family members share achievements effectively:

  1. Provide simple sharing guidelines:
    1. Each person gets uninterrupted time
    2. Share one or two successes (depending on family size)
    3. Include both what was achieved and how it felt
    4. Mention challenges overcome if applicable
    5. Keep shares relatively brief
  2. Offer sharing prompts for different achievement types:
    1. Learning: “I figured out how to…”
    2. Effort: “I worked really hard at…”
    3. Helping: “I made a difference by…”
    4. Courage: “I was brave when I…”
    5. Perseverance: “I kept trying until…”
    6. Creative: “I created/designed/imagined…”
    7. Unexpected: “Something surprising I accomplished was…”
  3. Model appropriate sharing:
    1. Share your own genuine achievements
    2. Include small as well as larger successes
    3. Demonstrate appropriate level of detail
    4. Show how to acknowledge help received
    5. Occasionally share how you overcame a setback

3.

Fostering Supportive Responses:

Teach family members to celebrate each other’s achievements:

  1. Model and encourage positive responses:
    1. Focused attention during sharing
    2. Specific affirmations (“I’m impressed by how you…”)
    3. Thoughtful questions (“What part was most challenging?”)
    4. Connection to values (“That shows how much you value…”)
    5. Genuine expressions of pride
  2. Create a physical response system:
    • Special claps or cheers
    • High fives or fist bumps
    • Success tokens given by listeners
    • Stickers for a family success chart
  3. Guide children in responding to others:
    • “What did you notice about mom’s achievement?”
    • “How can we show dad we’re proud of him?”
    • “What question could you ask your sister about her success?”

4.

Including Everyone Meaningfully:

Ensure that all family members can participate successfully:

  1. Adjust expectations for different ages:
    1. Younger children may need prompting
    2. Teens might prefer written sharing
    3. Allow drawing or acting out for non-verbal expression
    4. Parents share age-appropriate achievements
  2. Help those who struggle to identify successes:
    1. Provide advance notice to prepare
    2. Offer pre-session brainstorming
    3. Share your observations of their achievements
    4. Start with simple categories (“something you enjoyed doing”)
  3. Address potential challenges:
    1. Competition between siblings
    2. Reluctance to share
    3. Dominating the conversation
    4. Minimizing others’ achievements
    5. Exaggerating accomplishments

5.

Extending the Impact:

Maximize the benefits beyond the sharing session:

  1. Document successes shared:
    1. Keep a family success journal
    2. Take photos of special achievements
    3. Create a yearly success scrapbook
    4. Make audio recordings of sharing sessions
  2. Connect to future goal-setting:
    1. “What would you like to share at our next success night?”
    2. “Does hearing about these successes give you any ideas?”
    3. Periodically review past successes for inspiration
  3. Build on the supportive atmosphere:
    1. Reference success stories during the week
    2. Remind of past achievements during challenges
    3. Create a family identity around mutual support
    4. Expand to include extended family occasionally

Variations for Different Family Situations:

classroom-group-discussion
  • Blended families: Ensure all children have equal opportunity for sharing and recognition
  • Single-parent families: Include other supportive adults occasionally
  • Families with wide age gaps: Create sharing pairs or use age-appropriate prompts
  • Busy families: Combine with an existing routine like Sunday dinner

These goal-setting and achievement recognition activities help children develop:
  • Confidence in their abilities
  • Perseverance through challenges
  • Planning and organizational skills
  • Recognition of their own progress
  • Celebration of effort as well as outcomes
goal-setting-and-achievement-recognition-activitie

Remember that for children who tend toward self-pity, learning to set achievable goals and recognize their own accomplishments provides concrete evidence that counters negative self-perception. 

Through consistent practice with these activities, children build a foundation of competence and confidence that naturally diminishes tendencies toward helplessness and victimhood.

Next Steps

set-realistic-goals-and-celebrate-achievements--bu
  • Select one activity to implement this week
  • Start with simpler versions and build complexity
  • Be consistent in acknowledging achievements
  • Model goal-setting and achievement celebration yourself
  • Connect goal achievement to developing character qualities

The goal is to help your child experience the satisfaction of accomplishment and develop the skills to approach challenges with confidence and persistence rather than defeat and self-pity.